Before you start
Please note that upgrading via the wizard is possible only for version 2.0 and above.
If you are currently using an older version of KBPublisher upgrade to version 2.0 first.
Option 1 (retain current installation until you have tested the upgrade)
- Make a copy of your previous KBPublisher installation database. This database will be modified during the upgrade.
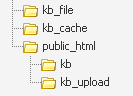
- Unpack the distribution package to a directory with a different name to that of your current knowledgebase directory, for example to "kb_new". This ensures that the previous installation is not overwritten.
- Open your browser and go to http://<your_domain>/<kb_installation_path>/setup/index.php, where <your_domain> is your domain name, and <kb_installation_path> is the path where KBPublisher is installed that you created in step 2. e.g. http://mydomainname.com/kb_new/setup/index.php. The installation wizard comes up.
- Follow the installation wizard instructions.
- After testing the new installation, rename your current (old) KBPublisher installation directory to something appropriate, for example to "kb_old".
- Rename new KBPublisher installation directory to your previous installation directory name.
- Update configuration file <kb_installation_path>/admin/config.inc.php by setting new values for $conf['admin_home_dir'] and $conf['client_home_dir'].
- Copy the license file from the previous version into the directory that contains upgraded version, i.e. copy 'kb_old/key.php' over 'kb/key.php'
Note that this option creates a new database. If you wish to continue to use the original database, then once you have tested that everything is working, backup the old database, rename the new one and change the database name in config.inc.php to match the name of the original.
Option 2 (upgrade directly into the current knowledgebase)
- Rename your current KBPublisher installation directory. For example to "kb_old".
- Backup your database.
- Unpack the distribution package to the directory where the previous version of KBPublisher was installed.
- Copy the license file from the previous version into the directory that contains upgraded version, i.e. copy 'kb_old/key.php' over 'kb/key.php'
- Open your browser and go to http://<your_domain>/<kb_installation_path>/setup/index.php, where <your_domain> is your domain name, and <kb_installation_path> is the path where KBPublisher is installed. e.g. http://mydomainname.com/kb/setup/index.php. The installation wizard comes up.
- Follow the installation wizard instructions.
Option 3 (replace modified files only)
With some small KBPublisher upgrades, we supply a quick upgrade option called a "Modified Files Only" package. For example, this package is available to upgrade from v3.0 to v3.0.1 This allows you to simply replace modified files rather than doing a full upgrade. You can download it from your client area in the same way you can download a full upgrade package.
The modified files package contains:
- A kbp folder that contains all modified files to be copied. The structure of the folder and sub-folders is the same as the KBPublisher directories/files structure
- A My-SQL script to run, called db_upgrade_from_[version]_to_[version].sql, that updates the version number of your database
- A file called how_to_upgrade.txt that tells you what you need to do to upgrade
- A list of updated files in updated_files.txt.
Standard steps to upgrade:
- Backup your current KBPublisher installation, directory and database (recommended).
- Copy the contents of the kbp folder found in downloaded "Modified Files Only" package to your current KBPublisher installation directory. We recommend that you copy the files by folder, rather than all at once.
(ATTENTION: Mac OS users. You should copy file by file. Do not copy folder by folder. It does not work for you and will replace entire folder(s) and delete non modified files).
- Upgrade your database by running the db_upgrade_from_[version]_to_[version].sql file found in downloaded "Modified Files Only" package. If your KBPublisher tables prefix is not "kbp" then you should update sql file and set you tables prefix.
For example from:
UPDATE `kbp_setting` SET `input_id` = '5' WHERE `id` = 46;
To:
UPDATE `your_prefix_setting` SET `input_id` = '5' WHERE `id` = 46;
Notes: