This article describes the Admin area home page and reviews the standard information you see and actions you can perform throughout the Admin area.
Home page
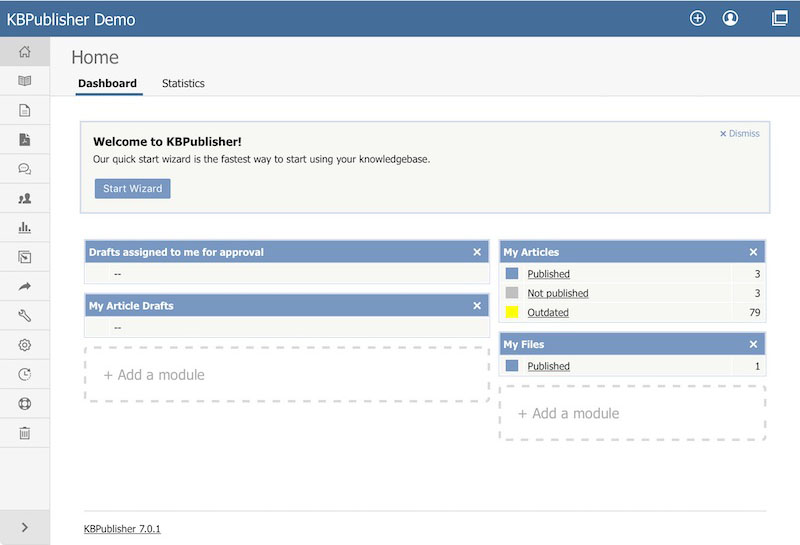
When you log in to the Admin area you see the Home page:
This page has two tabs: Dashboard and Statistics.
To add the information that appears on the Dashboard or Statistics tab, select that tab, then click the Add a module block. In the form that appears check the check boxes beside the information that you want to display. Any changes you make take effect when you dismiss the form.
Dashboard tab
This tab displays a summary of content created by or assigned to you, including your articles and files in draft form, published articles, and articles and files assigned to you for approval. The content is grouped within each category by status. Click any link to see a detailed list of the content in that category and status.
Statistics tab
This tab displays counts of articles, files, and users in various categories. Click on any link to see more details. If you are logged in as an Admin user, you see information for the whole knowledgebase; otherwise you see statistics for your own articles and files only.
Common actions in the Admin area
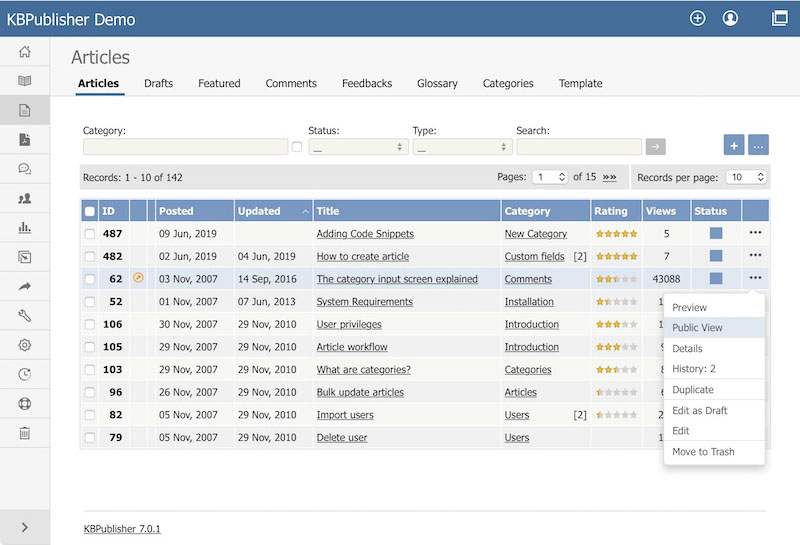
This section reviews information you can see and actions you can take in the Admin area of KBPublisher. The image shows the articles screen because it has the most functionality, but the explanations are applicable for working with files and feedback in the knowledgebase as well.
The main section of the display is a list, in this case of the articles in your knowledgebase.
To create a new record, click the [ + ] icon and complete the form that appears.
You can perform certain actions on the articles in the list. Click the [ ... ] on the right in the Action column for an article and choose from the available options, such as Preview and Edit.
For many columns, you can sort the list by the values in that column by clicking the column header. Click again to reverse the sort order.
You can adjust how many items appear on each page by changing the number in the Records per page field.
You can browse from page to page using the << and >> buttons, or by choosing a number from the Pages dropdown list.
Filtering
You can filter the list using one or all of the fields at the top of the tab:
Category - select a category to display only records in that category. Check the box to the right of the field to also display records in subcategories of the category you select.
Status - select a status to see only records with that status.
Type - select:
All types (the default, indicated by __)
a type to see records with that type assigned.
Any type assigned to see records which have any type assigned to them.
No type assigned to see only records that do not have a type assigned to them.
Search - enter keywords to search for content with that text in their title or body. Put an asterisk (*) as a wildcard before and/or after the string you enter to broaden the search. For example, *health* would return content with "health", "unhealthy", and "healthcare", among other words.
Click the [ →] button to filter the list. To return to the full list, remove entries to all filter fields and click → again.
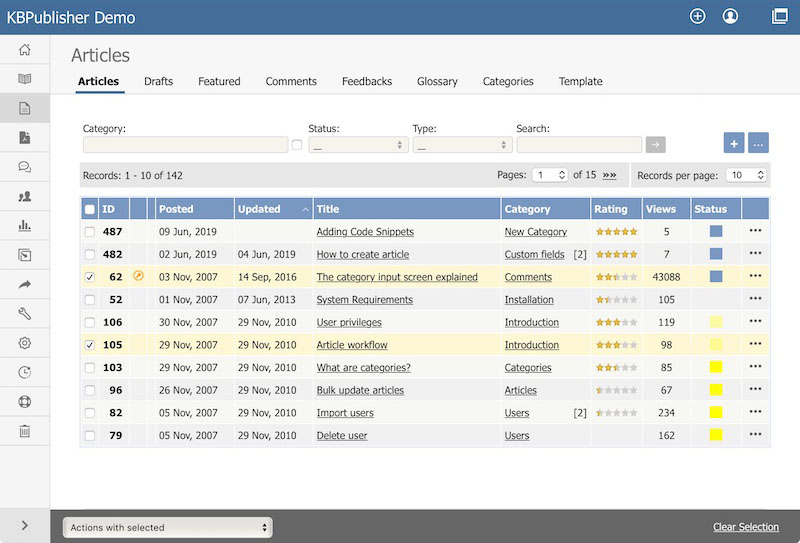
Bulk Actions
You can also perform some actions, such as Set Status, on several articles at the same time. To do this, check the check box at the left end of the row for each article you want to act on, and pick the action from the Actions with selected menu which appears at the bottom of the page.
Adjustable List View
The list display gives you information about each article (in this example), including:
Item ID.
If the article is scheduled, indicated by a clock icon.
If the article is private, indicated by a key icon.
When the article was posted and last updated.
The article's title. Click the title to see the article.
The article's category. If it is in more than one category, the number of categories also appears in square brackets. Click the category name to see just the articles in that category.
The number of views the article has had.
If readers have rated the article, its rating and the number of votes received.
The article's status, indicated by a block of color. Hover over the color to see what the color represents.
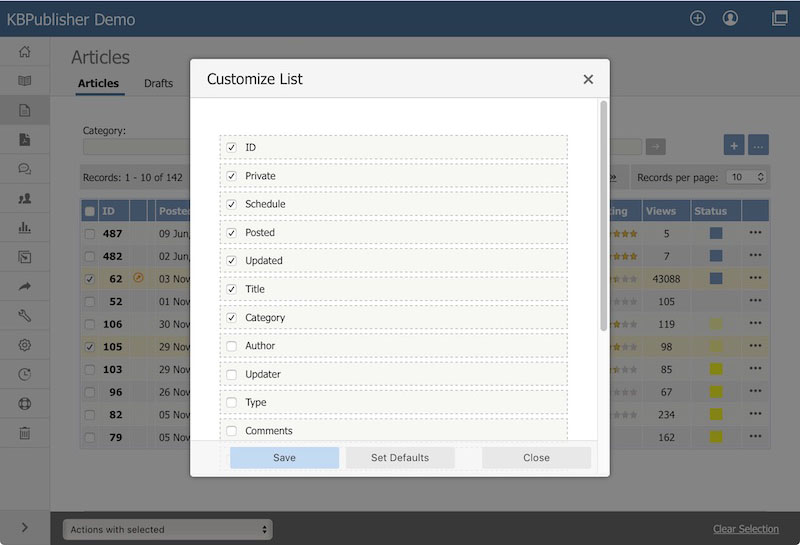
List fields are adjustable. Right-click the blue header row and select Customize List to adjust list fields. You can add, remove, and re-order the fields.