To find the Export Articles tab, select Export from the menu bar. Then select Export Articles from the three tabs available:
What does export articles do?
The Export Articles tab lets you export the articles and information about the articles, in spreadsheet form. You could then review and work with the material in Excel or any other spreadsheet tool, or use the file to import the data into a database.
To manage your exports
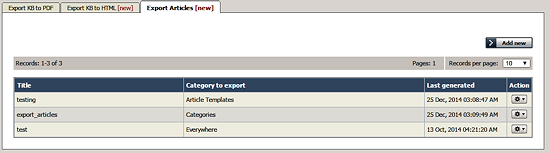
The tab displays a list of your export templates. Click the Action button to the right of an entry for the action options:
- Details - Review the details of exports using this template, including the date and status of the most recent export.
- Click Generate beside any export type to regenerate the export files.
- Click the export type name (CSV, EXCEL, or XML) to download a ZIP file of the exported files.
- Click Update to move from here to the Update action, or click Back to return to the list of export templates.
- Update - Update the selections or description for the export, following the information for creating a new export, below. Click Save to save your changes; click Save and Generate to export the data for this export again; click Cancel to abandon your changes and close the form.
- Delete - When you select this option, a confirmation form appears to make sure you really want to delete this export template. Click OK to remove the record; click Cancel to keep the template and end the process.
To create a new export template
To create a new export template, click Add new to open the Export options form. Complete the form to export the articles you want, and the metadata about them you select.
- Title - Required. Provide a title for this template.
- Description - Optional. Provide a description for this template.
- Category to export - You must select at least one category. Click the + button and select from the options available. If you need to export all KB, choose "All categories (All KB)".
- Export for user - Some articles may be invisible to certain user types. Select the user type to filter the categories you chose to include just the content that user type can see. Options are:
- Admin User - Export includes all content in the selected categories. The system ignores any private attributes for the user.
- Not logged in user - Export includes content a user who is not logged in can see.
- Logged in user - When you choose this option you can specify roles to limit the export to the content a user with a selected role can see. To add a role, click the + button and select from the options. If you specify no role, then the export includes all content a logged-in user can see.
- Columns - Select the columns to include in the export by dragging the names of the columns you want from the "Columns not included in table" list to the "Columns included in table" list. To remove columns from the export, drag the column names back to the left-side list. You can rearrange the columns in the export table by dragging the column names higher or lower in the right-side list.
- Encode images - Select this option to encode any images included in the export in base64 format.
- Export published articles only - Select this option to include in the export only published articles.
- Document options - You can select one or more of the export options: CSV, XML, and EXCEL.
For CSV you can accept the defaults for the following fields, or edit the field contents to suit your needs:
- Fields terminated by - Default is a comma (,).
- Fields optionally enclosed by - This allows you to include the field terminator, such as a comma, within the text of a field. The default is double quotation marks (").
- Lines terminated by - The default is \n.
- Include field names row - Select to include a header row of all field names.
Click Save to save this template; click Save and Generate to save the template and generate files in the formats you have selected with the required data; click Cancel to close the form without creating a template.

